•
5 Mins Read





Clear articulation is not about sounding “perfect.” It is about helping your listener understand your message without strain, whether you are leading a meeting, recording a video, teaching, presenting, or having an everyday conversation. This guide walks you through How to Improve Articulation: 3-Step Exercise, a simple routine that combines awareness, precision, and real-world speaking practice.
Why does articulation matter for everyday speaking?
Articulation matters because people respond not only to what you say, but to how easily they can follow it. When consonants blur, endings disappear, or words run together, your listener has to work harder to keep up. Clearer speech reduces that effort and supports more confident, effective speaking.
Good articulation also helps you sound more prepared. You do not need a dramatic voice or formal training to become easier to understand. With focused vocal exercises and a few minutes of regular practice, you can enhance speech clarity in a practical, noticeable way.
Articulate speech is especially useful in moments where attention is limited. A client call, classroom explanation, podcast intro, job interview, or team update all become stronger when your words land cleanly. The goal is not to speak stiffly; the goal is to make your natural voice more precise.
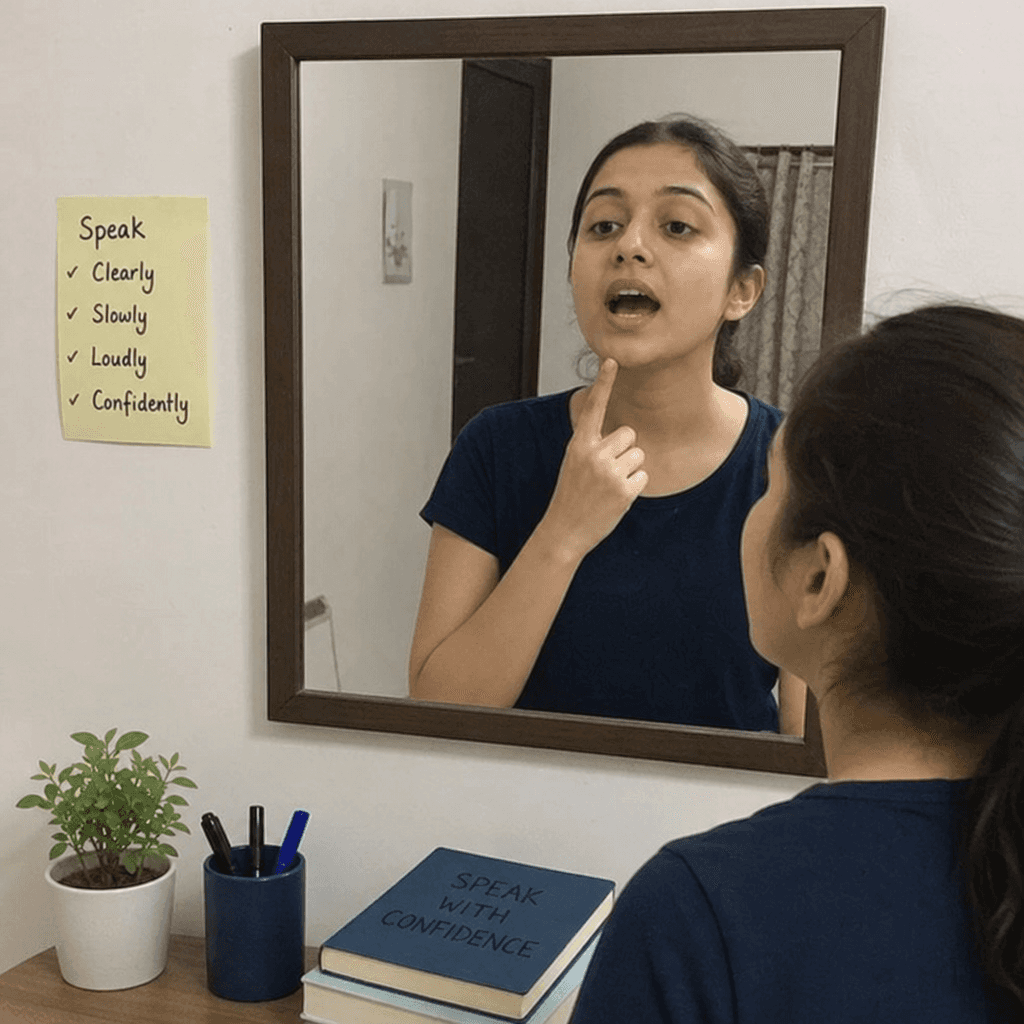
The foundation of clear communication
Before jumping into exercises, it helps to understand what articulation actually involves. Speech clarity depends on the coordinated movement of the lips, tongue, jaw, breath, and voice. When these parts move with enough energy and timing, words sound crisp. When they are tense, lazy, rushed, or disconnected, speech can become muddy.
Many people assume they mumble because they have a “bad voice.” In reality, unclear speech is often a habit. You may drop final consonants, keep your jaw too tight, speak before taking enough breath, or rush through familiar phrases. Once you notice the habit, you can train a better one.
The best speech improvement routines are simple enough to repeat. A long, complicated warm-up may feel impressive, but it is easy to abandon. A short sequence that you can do before a call, presentation, lesson, or recording is far more useful.
What gets in the way of articulate speech?
The most common barriers to articulate speech are speed, tension, low mouth movement, weak consonant endings, and lack of breath support. These issues often overlap. For example, if you speak too quickly, your mouth may not have time to shape each sound, and your final consonants may vanish.
Tension is another major factor. A tight jaw limits vowel shape. A stiff tongue can make sounds like “t,” “d,” “l,” “r,” and “s” harder to form. Even the lips matter; if they barely move, words with “p,” “b,” “m,” “f,” and “v” can lose definition.
Here are signs your articulation may need attention:
People often ask you to repeat yourself, especially in busy rooms or on calls.
Your words sound clear in your head but less clear on recordings.
You rush when nervous and lose the ends of sentences.
You avoid speaking up because you worry you will not be understood.
You feel tired after speaking because you are forcing sound instead of using efficient technique.
None of these signs mean something is wrong with you. They simply show where your speaking habits can become more intentional.
The 3-step articulation exercise
This exercise is designed to be short, repeatable, and useful for real speaking situations. Practice it slowly at first. Precision comes before speed.
Step 1: Wake up the mouth
Start by loosening the muscles that shape your words. Many articulation problems begin before speech even starts: the jaw is tight, the lips are passive, or the tongue is not moving freely. A quick warm-up prepares your mouth to work with more range.
Try this sequence:
Jaw release: Open and close your mouth gently five times, as if beginning a yawn. Do not force the stretch.
Lip activation: Say “pa, ba, ma” slowly, then repeat three times with clear lip contact.
Tongue movement: Touch the tip of your tongue behind your top teeth, then move it to the lower teeth. Repeat ten times.
Cheek and lip stretch: Smile, then round the lips as if saying “oo.” Alternate five times.
This step should feel light, not intense. You are not trying to strain your face. You are simply reminding your articulators to participate.
Step 2: Sharpen the consonants
Consonants give words their edges. If vowels carry tone and openness, consonants provide structure. Clear communication often improves quickly when you focus on the beginning and ending sounds of words.
Use short sound patterns first:
“ta, da, la, na”
“pa, ba, ma”
“ka, ga”
“fa, va”
“sa, sha, za”
Say each pattern slowly, then at a moderate pace. Keep the jaw relaxed and avoid clenching. You should feel the tongue, lips, or soft palate making clean contact for each sound.
Next, practice word endings. Many speakers begin words clearly but fade out at the end. Try saying these pairs with special attention to the final consonant:
light / like
plan / planned
cap / cab
wish / wished
fine / find
speak / speech
Do not overpunch every sound in normal conversation. This drill exaggerates clarity so your everyday speech becomes more balanced. Think of it like stretching before movement: the practice is more deliberate than the final performance.
Step 3: Move from drills into real sentences
The final step connects the exercise to actual speaking. Isolated sounds are useful, but the real goal is to sound clear while expressing ideas. Choose one short sentence you might truly say during your day.
For example:
“I’ll send the notes after the meeting.”
“The main point is easier than it sounds.”
“Let’s review the next step before we decide.”
“I want to make sure this is clear.”
Say your sentence three ways:
Slow and precise: Focus on every word ending.
Natural and connected: Keep clarity while sounding conversational.
Purposeful and expressive: Add meaning, emphasis, and intention.
This progression matters. If you only drill sounds, you may become clear but mechanical. If you only practice full sentences, you may repeat old habits. Combining both helps you build articulate speech that still sounds like you.
How can you practice without sounding unnatural?
You practice naturally by separating training from performance. During training, you can exaggerate mouth movement, slow down, and repeat sounds. During real speaking, you use the benefits of that practice without trying to pronounce every word like a stage announcement.
A useful rule is to aim for clarity, not perfection. Over-articulation can sound stiff if you carry it into casual conversation. Under-articulation can make listeners miss important details. The middle ground is speech that feels relaxed but intentional.
Try the “10% clearer” approach. Instead of changing your whole speaking style, make your consonants slightly cleaner, your pace slightly calmer, and your endings slightly more complete. Small adjustments are easier to maintain and less likely to feel fake.
A simple weekly practice plan
Consistency makes vocal exercises work. You do not need an hour a day. In fact, shorter sessions often build better habits because you can repeat them more easily.
Use this plan for one week:
Day | Focus | Practice |
Monday | Mouth warm-up | 5 minutes of jaw, lip, and tongue activation |
Tuesday | Consonant clarity | 5 minutes of sound patterns and word endings |
Wednesday | Sentence practice | 5 minutes with phrases you use at work or daily life |
Thursday | Pace control | Read a paragraph slowly, then naturally |
Friday | Recording check | Record 30 seconds and listen for unclear words |
Saturday | Real-world use | Choose one conversation to practice speaking clearly |
Sunday | Review | Repeat the 3-step exercise and note what improved |
When you listen to a recording, avoid judging your voice harshly. Most people feel uncomfortable hearing themselves at first. Instead, listen like a coach: Were the endings clear? Did the pace rush? Did certain sounds blur? That feedback gives you something specific to improve.
Practical tips for faster speech improvement
The 3-step exercise is the core routine, but a few supporting habits can make it more effective. These tips are especially helpful if you speak often for work, school, content creation, or leadership.
Pause before important points. A brief pause gives your mouth and mind time to align. It also signals that the next words matter.
Finish the last word of each sentence. Many people fade out near the end. Holding clarity through the final word makes your message feel complete.
Open the jaw for vowels. Consonants create edges, but vowels need space. If your jaw barely moves, words can sound trapped.
Practice at a slower pace than feels necessary. Your “slow” may sound normal to listeners, especially if you tend to rush.
Use meaningful material. Practice with sentences you actually say. This makes the skill transfer into real life faster.
Hydrate and rest your voice. A dry or tired voice can make clear speaking harder, even when your articulation is strong.
These habits support effective speaking because they address the whole delivery, not just individual sounds. Articulation improves when breath, pace, emphasis, and mouth movement work together.
When to use this exercise
The best time to practice is before you need your voice. Use the routine before a presentation, interview, sales call, lecture, livestream, podcast, or important conversation. Even two minutes can help if you focus on the steps that matter most.
You can also use it after noticing a pattern. If a recording sounds unclear, choose one sentence and run it through the three steps. If you were asked to repeat yourself in a meeting, practice the phrase you said and identify whether the issue was pace, volume, or articulation.
For long-term growth, attach the exercise to an existing habit. Practice after brushing your teeth, before opening your laptop, or before your first call of the day. A reliable cue helps the routine become automatic.
Common mistakes to avoid
One common mistake is trying to speak louder instead of clearer. Volume can help in some settings, but it does not fix blurred sounds. If your words are running together, more loudness may only create louder mumbling.
Another mistake is practicing too fast. Speed can be added later. In the beginning, slow repetition trains the muscles and the ear. You want to know what a clean sound feels like before asking your mouth to produce it quickly.
Finally, avoid turning articulation practice into self-criticism. Clear speech is a skill, not a personality trait. You are not replacing your natural voice; you are giving it more definition.
Key takeaway
Improving articulation does not require complicated training. Start by waking up the mouth, sharpen consonants with focused vocal exercises, and then carry that clarity into real sentences. Practiced consistently, this simple routine can enhance speech, support clear communication, and help you become a more confident, effective speaker.




Previous

Learn how leaders prepare for difficult conversations like layoffs, performance issues, and conflict, and how to rehearse delivery before having them.
Next

Learn how to give an impromptu speech with zero preparation by staying calm, organising your thinking, reading the room, using your existing expertise and ending with clarity.